SOLAR.
GARDEN.
ROOF.

ADVANCED
FLEXIBLE
AFFORDABLE


Protect.
Retain.
Recharge.

Schedule a Site Survey
Our Systems Designer will record, measure, or analyze your project. Information like, Roof design and condition, orientation, height, and pitch of roof(s) are starting point.

Available roof space, penetrations like roof vent locations, skylights, or structures and any other factors impacting system size and performance

"With a handful of components and without waste everyone can literally build any type of Green Roof
from extensive, roof top farms, intensive, plaza decks, Solar Garden Roof and Blue Green Roofs in combination with all the mentioned."

Perfect Solar Garden Roof and Klimaroof

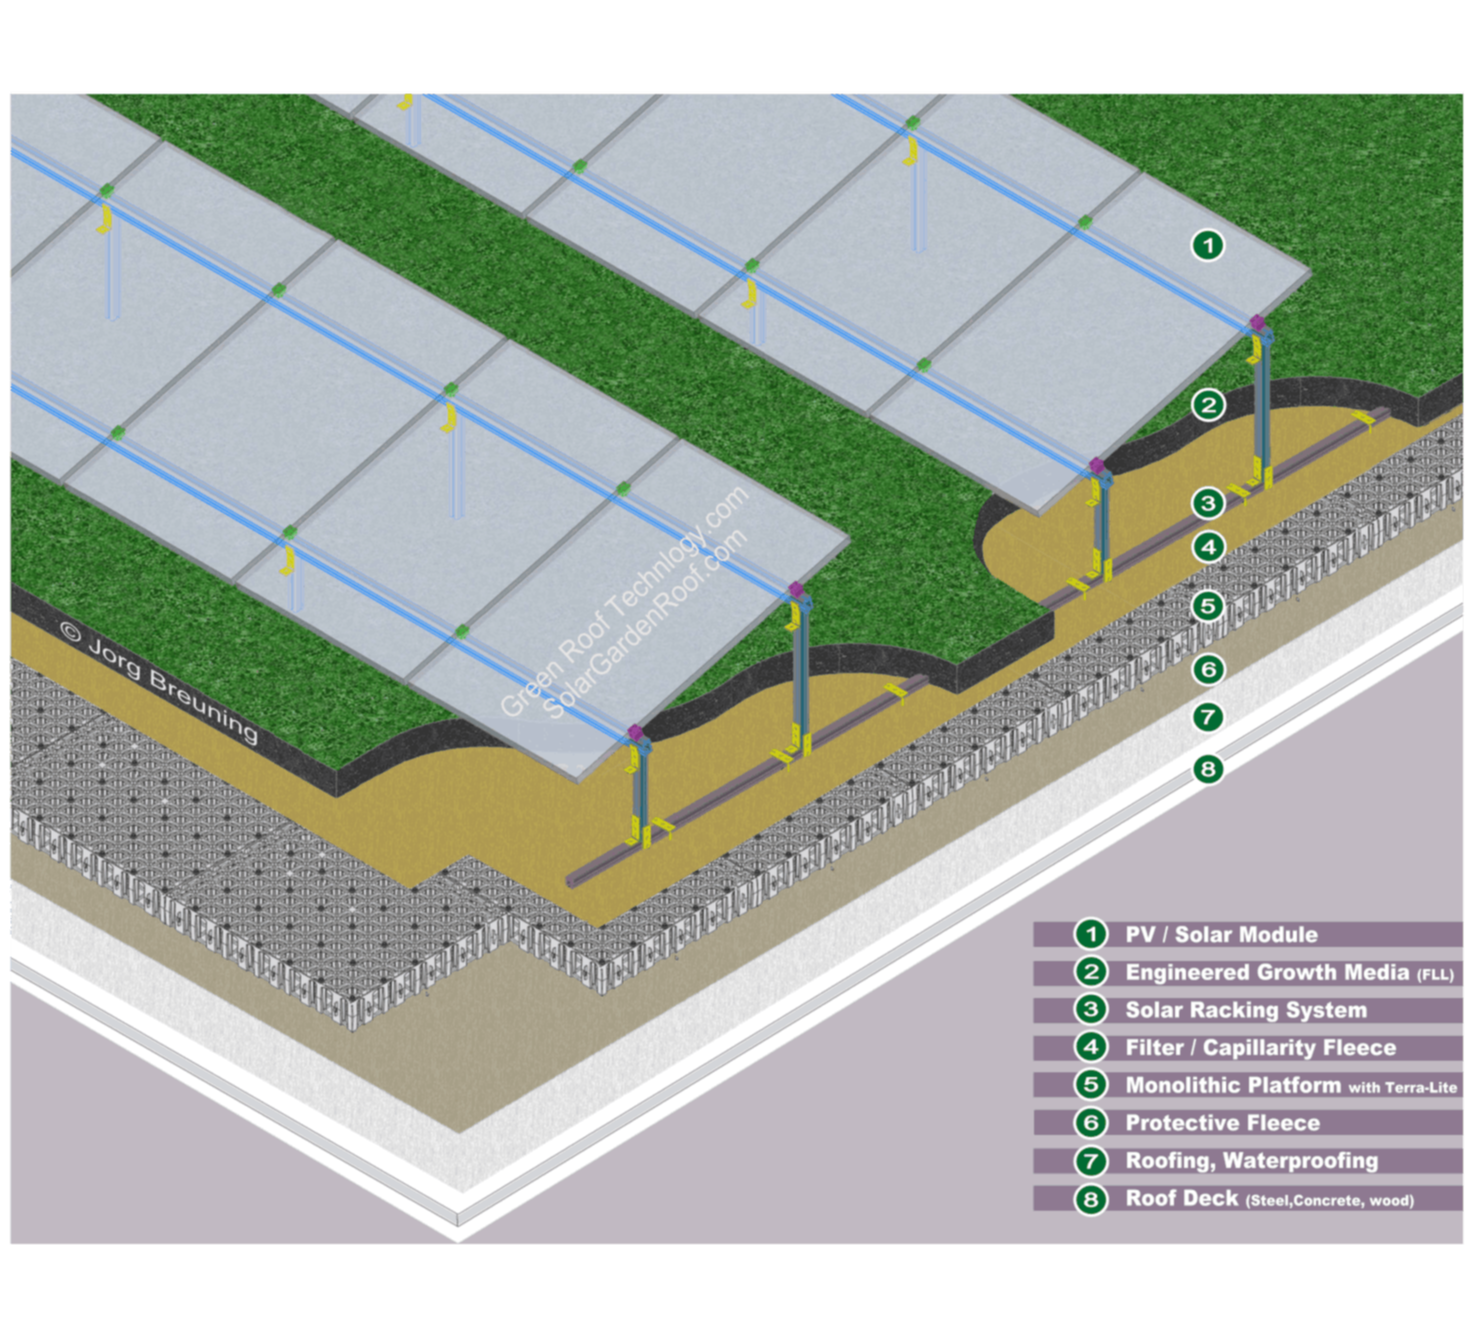
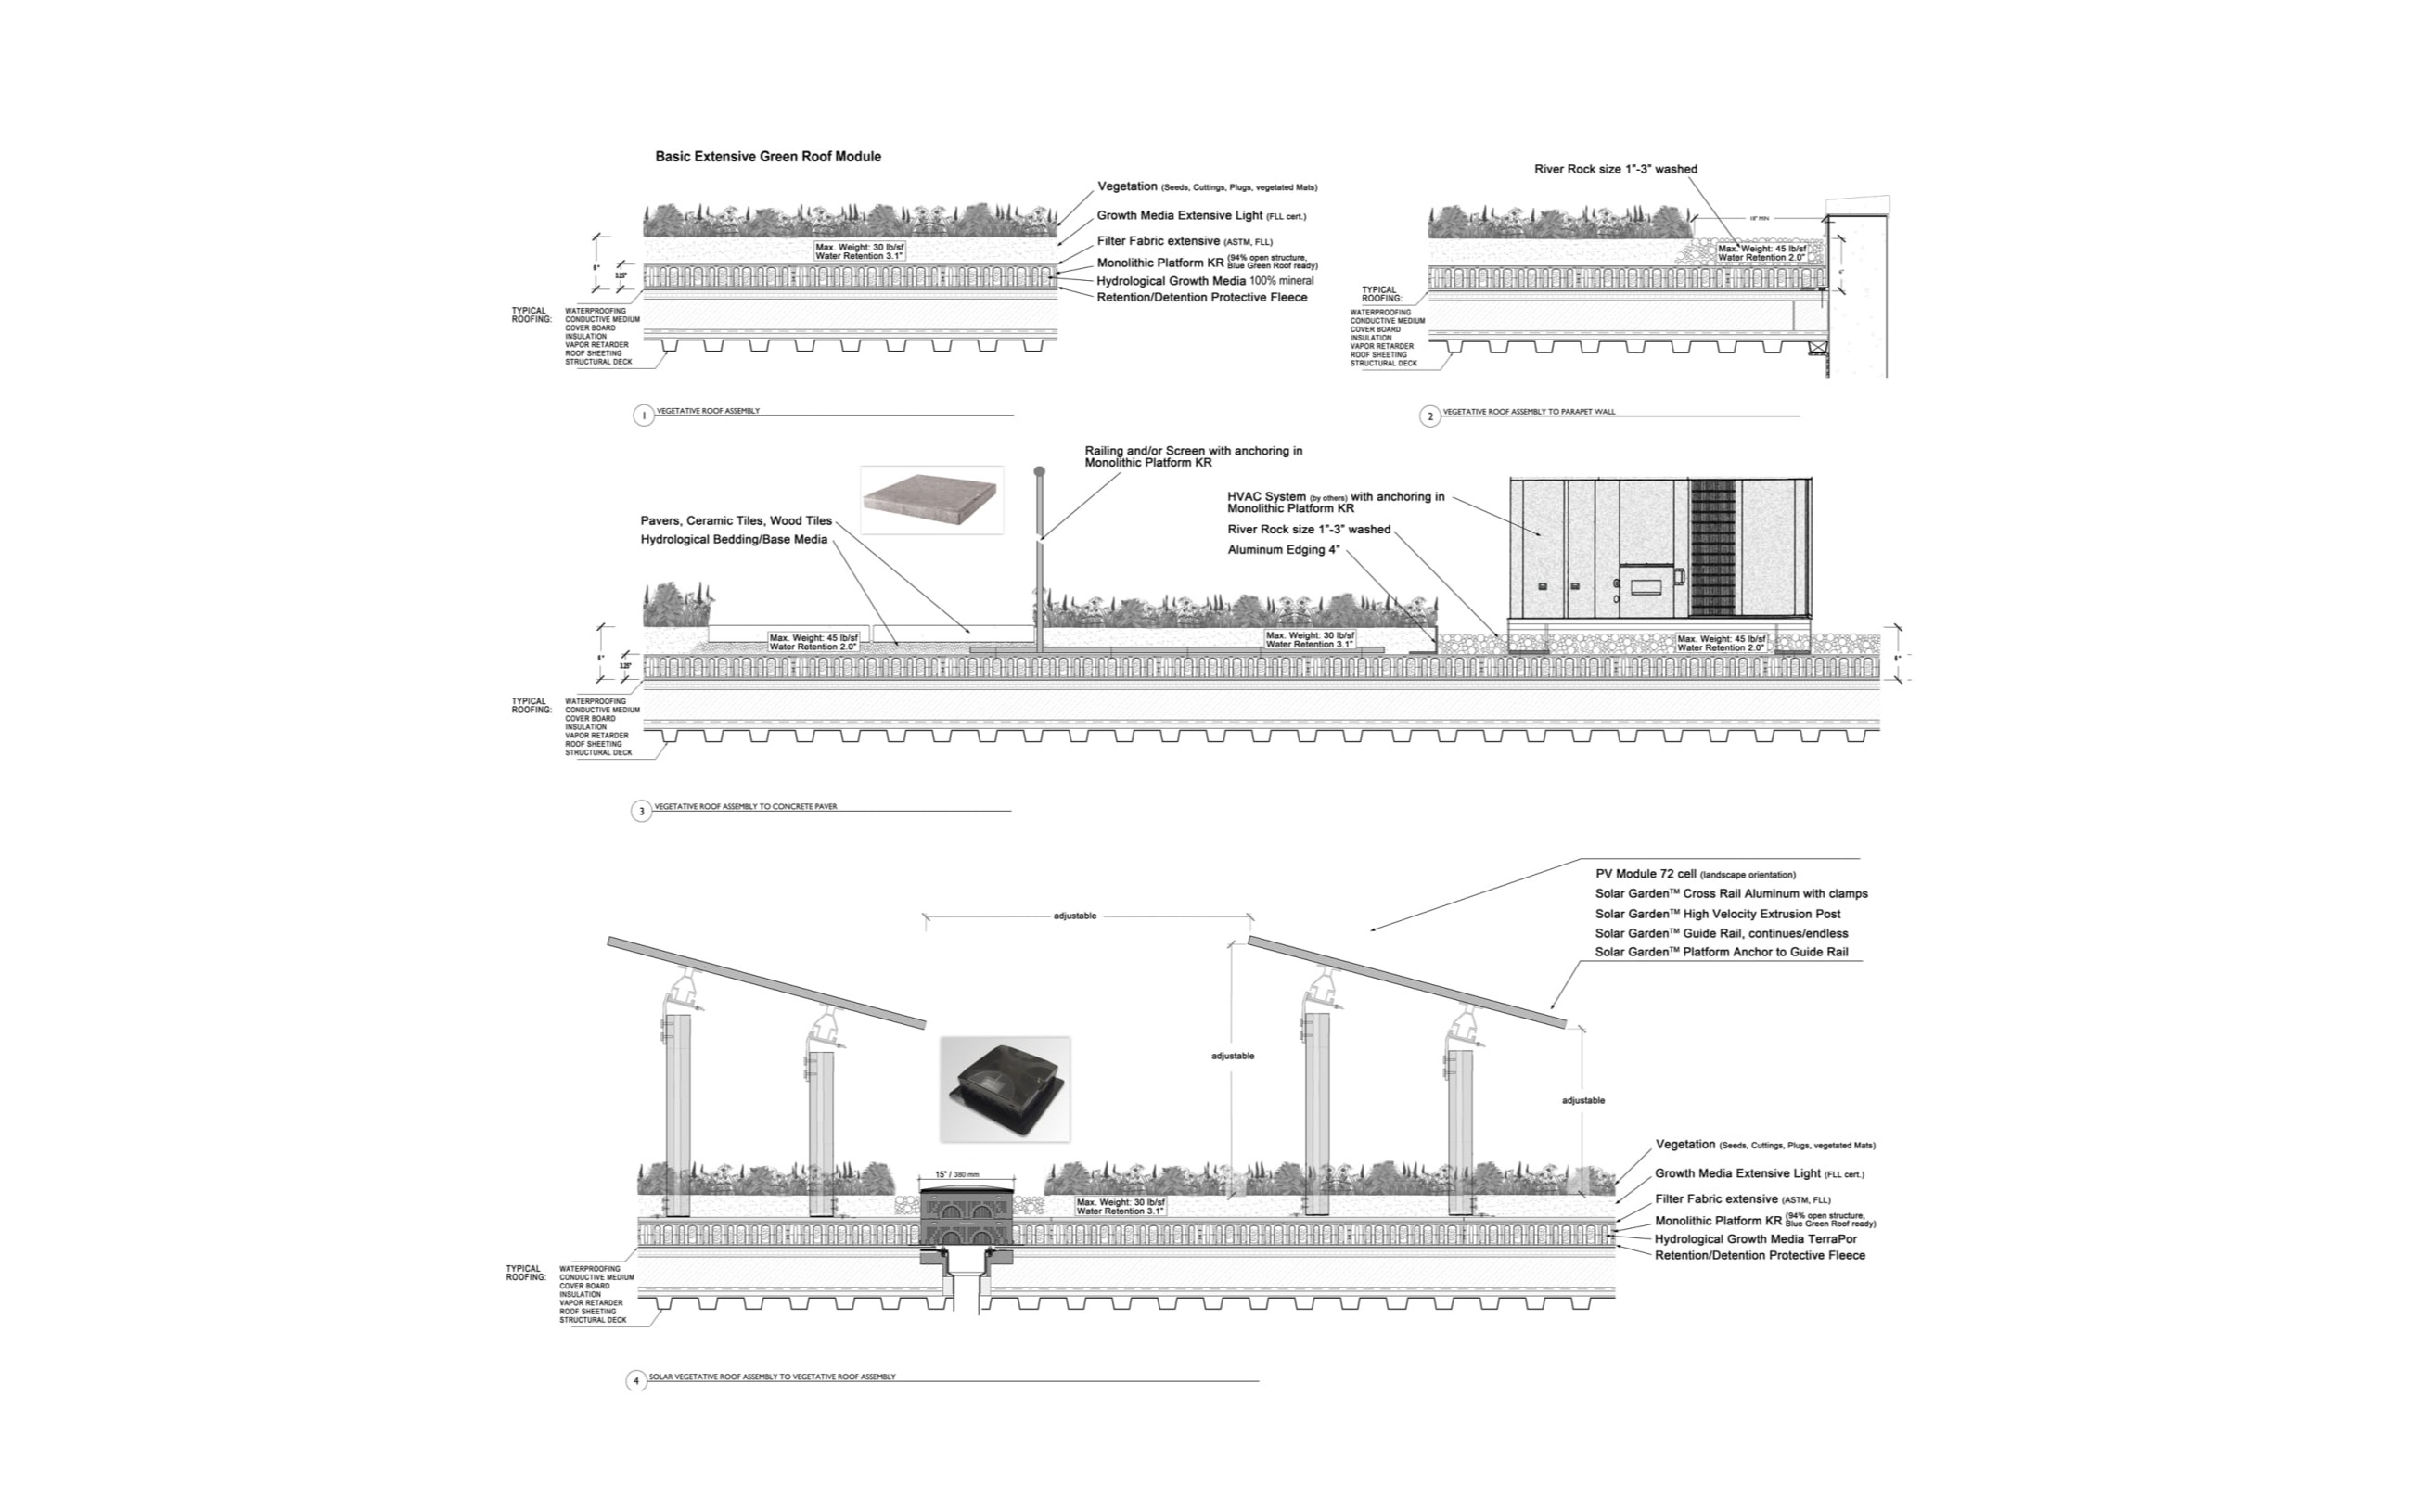
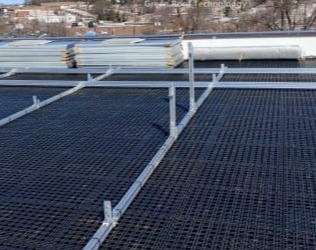
Typical Details of Standardized Solar Garden Roofs

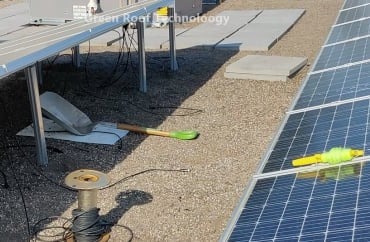
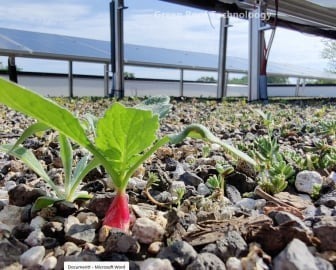
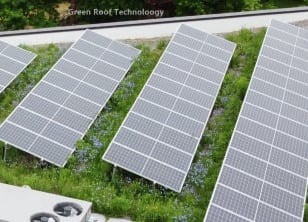
Extensive Green Roofs with biodiversity are the most versatile solution for commercial PV installation in "landscape" configuration. The same details can be used for Micro Windmills and most thermal solar systems. The details below are the benchmark for the industry and no-one should settle for less. All Green Roof components come with a lifetime warranty in accordance with a basic maintenance for PV and vegetation.
This is an ideal solution for midsize roofs and large roofs that span over over 500,000 square feet. Larger roofs (over 500,000sf) have options for tracking solar panels. 
All option can be provided as Non-Plastic versions with cradle-to-cradle (Circular Economy) certification. 

Stormwater Mitigation. Renewable. Energy

Case Study: Solar Garden Roof Installation

See below a Solar Garden Roof or Solar Green Roof (we don't call it Biosolar) in-depth and detailed installation procedure with real-world context and pictures. With a few components, no waste Installation, and the simplicity of configurations it is the ideal system for Green Roof installers providing valuable service to their clients but also to the experienced Solar installers.
Each specialized contractor can focus on their own strengths and don't need to do something they don't feel comfortable. No trail and error provides the highest value for customers with the best references for the hard working contractors. 

Leak Detection is important

Step 1

State-of-the-Art roofing that is root resistent according FLL is finished and an independent leak detection contractor (e.g. ILD) checks the roofing for leaks and writes a transition protocol.
The Leak Detection System remains installed for future leak testing and to pinpoint leaks if these occur. In most cases the buildings insurance pays for a Leak Detection system since it adds important safety to the structure. ILD Leak Detections systems make roofing warranties obsolete and cost less. 

Monolithic Platform for solar green roofs

Step 2

Wall-to-wall Installation of Retention/Detention Protection Fabric and Monolithic Platform. The installation shall consider an "over head" installation to ensure the roofing is not directly touched during this process. While the fabric is installed with min. 4" overlapping, the Monolithic Platform conveniently clicks into each other, creating a solid "floor".
Any adjustments or cuts can be done with strong scissors, respectively with cable cutters. 

advanced Racking System for max. flexibility

Step 3

Layout, install and anchor selected PV racking system starting with the base rail on the Monolithic Platform. The layout and anchoring method is based on the detailed drawings of the racking provider. Most standard aluminum profiles from different PV racking manufacturers are suitable.
This task can be performed by the Green Roof installer and or Solar contractor. 

mineral growth media on biosolar

Step 4

Fill Monolithic Platform with Hydrological Growth Media (100% mineral), levelled to the top of the Monolithic Platform. Ensure racking system remains clean.
Cover the Monolithic Platform with acceptable Filter Fabric (sometimes called separation fabric) from wall-to-wall with an overlapping of at least 4". This is also a good time to install cable channels if necessary by the PV module design.
Task by: Green Roof installer or Solar contractor.  

PV modules installed in landscape

Step 5

Install the engineered and biological Growth Media with in specified thickness on top of the Filter Fabric. Ensure the thickness is consistent +- 1/2" from specifications. This is also the best time to install pavers for access paths and/or other amenity or electrical items.
Parallel the PV modules (or Micro Windmills) can be installed on the racking system with suitable clamps including other required items for the Solar (e.g. micro inverter).
Cleaning of all PV modules after work is standard procedure.

green roof plants and Nanny plants

Step 6

Installation of vegetation and biodiversity with many options or a combination of the following common plant establishing methods: Seeds, rhizomes, leaf, stem or tip cuttings, plugs, potted plants, pre-vegetated mats, bare rooted trees or shrubs or root balled trees are possible depending on the overall design intent.  In most installations during summer we recommend the use of “Nanny” plants (here seen after 3 weeks without irrigation system.)

perfect solar green roof

Step 7

The establishing phase of the plants shall be monitored on a regular basis. Therefore it is recommended that every Solar Garden Roof comes with an at least one (1) year maintenance contract (typically included in the Green Roof installer contract). The service team  also ensures that PV modules remain clean and inspects the roofing in exposed areas. Any visit is finalized with a detailed protocol where one copy should remain onsite.

Location
  • Baltimore, USA
  • Projects: Worldwide
Email
  • info (at) greenrooftechnology.com

Send your messages